How Often Should You Clean a Dryer Vent? Signs It’s Overdue
Most homes need annual dryer vent cleaning; busy, pet-friendly households benefit from every-six-month service. Here’s how to tell when it’s time.
Annual inspections catch hidden lint, kinked hoses, and loose joints before they cause problems.
How often should a dryer vent be cleaned?
Most homes should schedule a full dryer vent cleaning every 12 months. If you do laundry for a big household, dry lots of towels and bedding, have shedding pets, or your duct run is long with multiple elbows, plan on every six months. These schedules track with national fire-safety guidance and with what we see in real homes around PA & NJ. Lint begins to pile up at elbows and at the exterior hood well before the two-year mark. As resistance builds, dry times creep up and temperatures in the appliance climb beyond what the manufacturer expects.
Annual for most baselineEvery 6 months large families / long runsQuarterly heavy towels • pets • roof vents
Why some homes need more frequent cleaning
Loads per week: Sports seasons and new-baby phases can double laundry volume overnight.
Fabric type: New towels, fleece, and athletic wear shed aggressively and dump debris at the first elbow.
Duct length and layout: Long runs and tight 90° turns increase static pressure; lint drops out earlier.
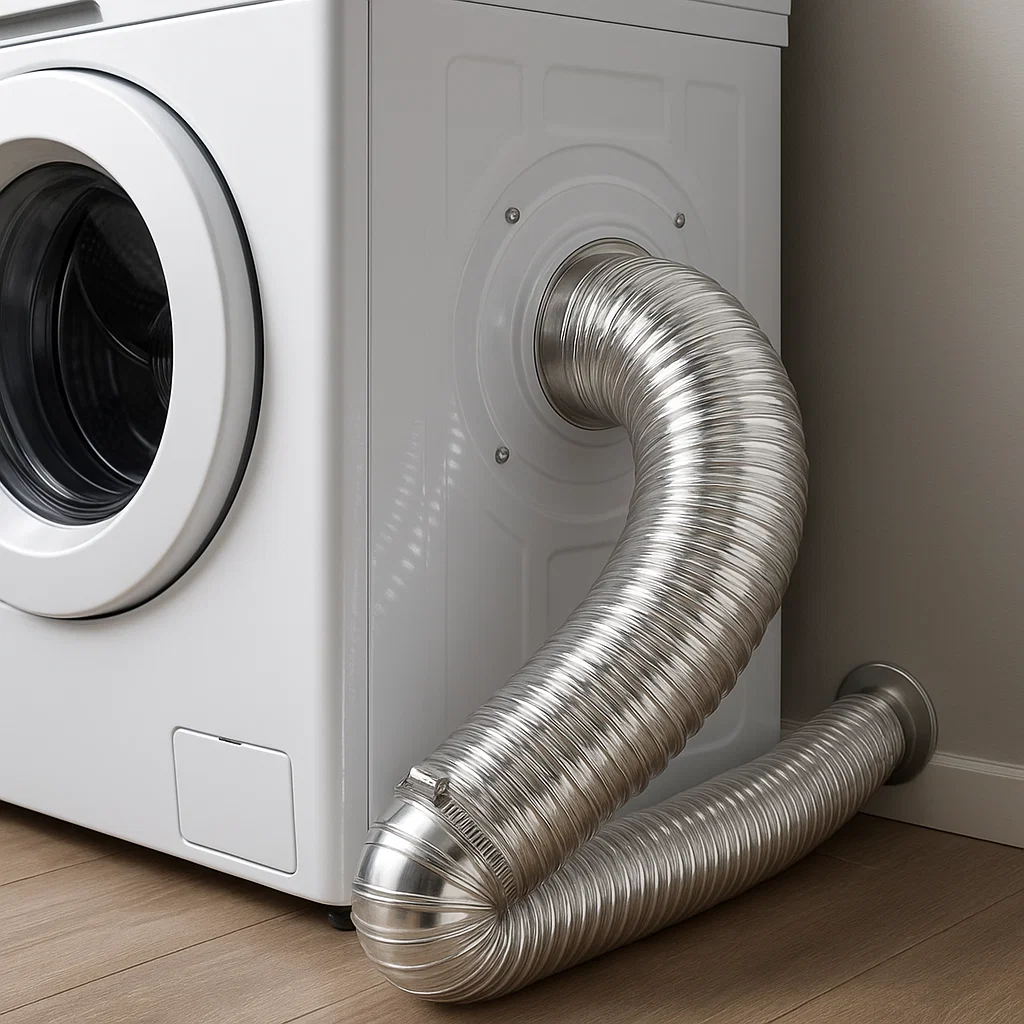
Transition duct choice: A short, UL 2158A-listed transition outperforms a long, crush-prone foil hose.
Pets & remodeling: Hair and renovation dust bind with lint to form heavy clumps.
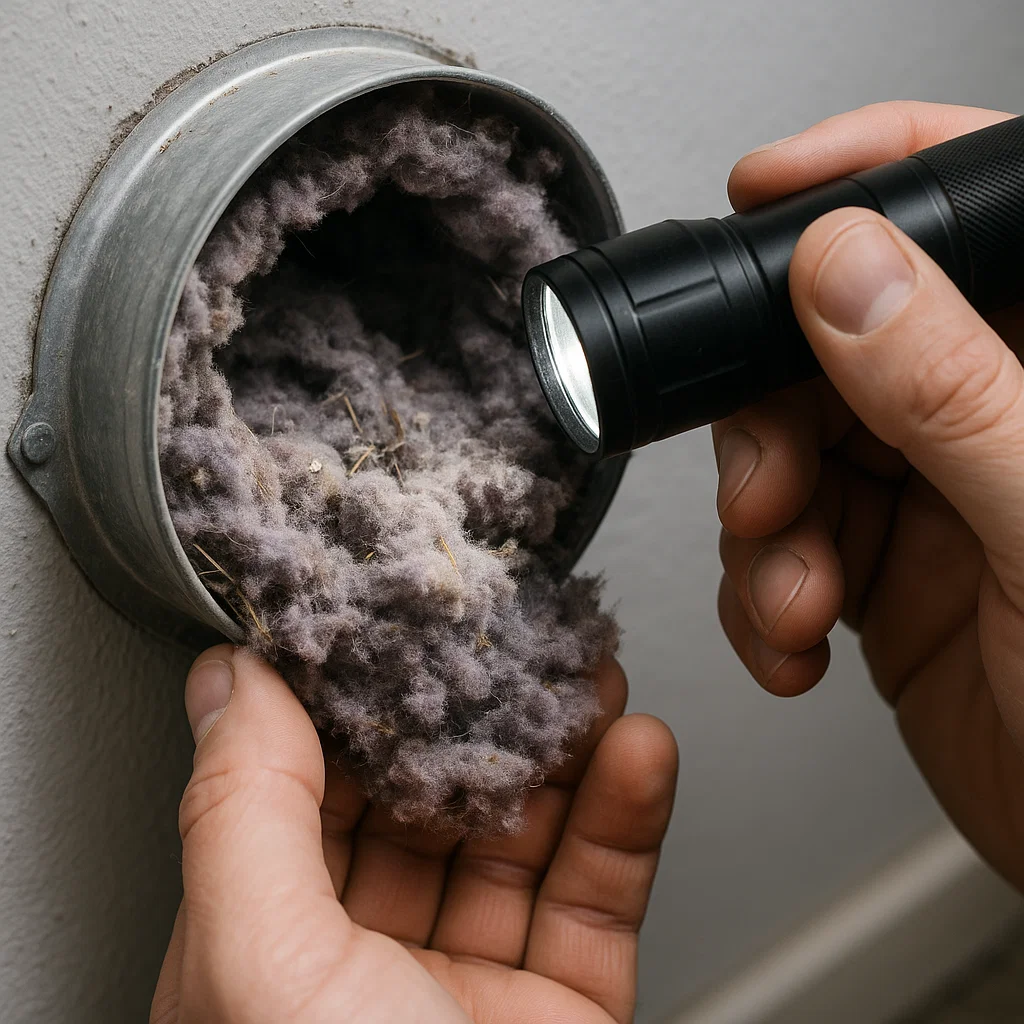
Lint piles up where airflow slows—elbows and the exterior hood are the usual choke points.
7 signs your vent is overdue
Drying takes longer than it used to. A dependable 45-minute cycle has drifted to 60–75 minutes.
Clothes come out hot but still damp. Heat is present; moisture isn’t leaving the drum fast enough.
The laundry area feels warm or humid. Back-pressure is pushing hot, moist air around the machine.
Lint appears in odd places. Around the door gasket or across baseboards near the dryer.
Weak airflow at the exterior hood. The damper barely opens when the dryer runs.
Musty or burnt-lint smell. Damp lint and overheated fibers smell before a blockage is complete.
Error codes on some models. Temperature and flow monitoring can trigger service messages.
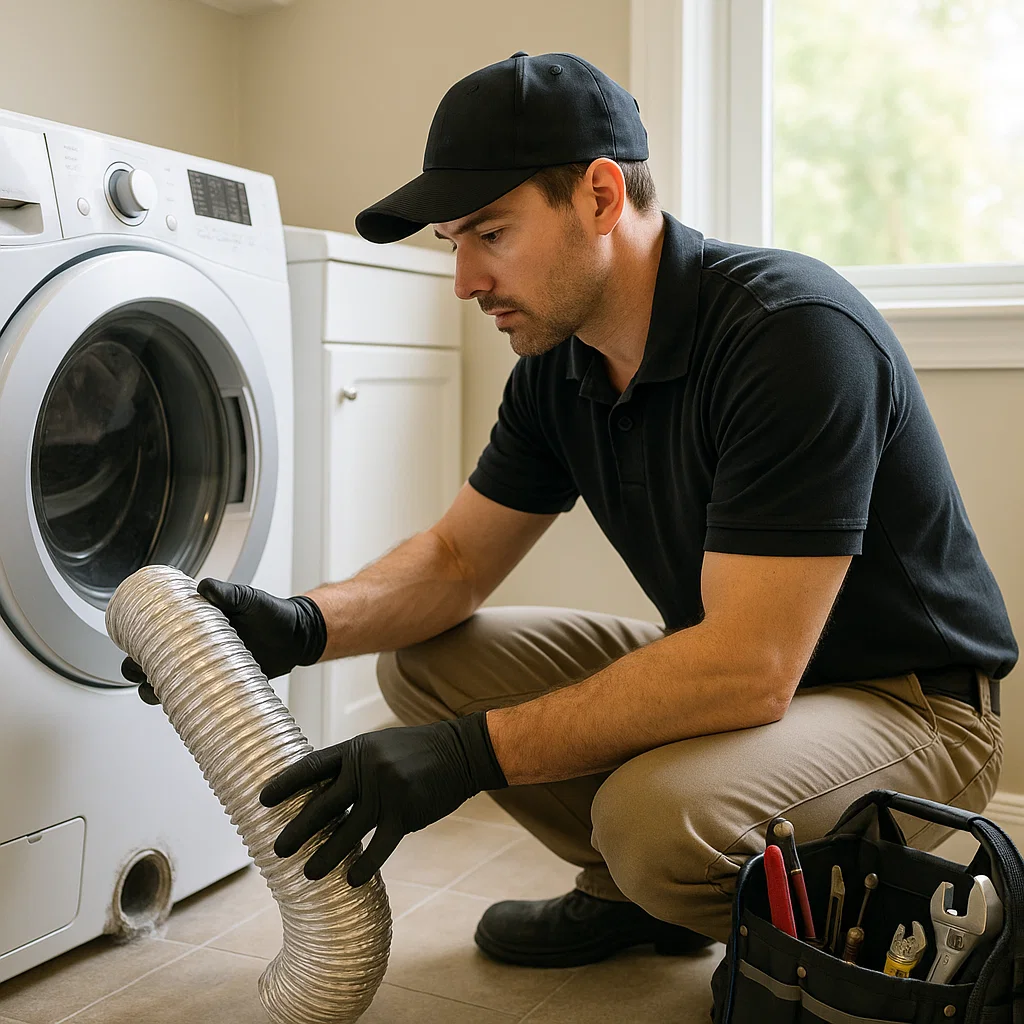
What our professional cleaning includes
Walk-through & safety check. We confirm transition type, run length, and hood location; gas shutoff is verified.
Prep & protection. Power is isolated, the dryer moved carefully, and finishes are protected.
Rotary brushing with capture. We scrub the entire run while a high-flow vacuum removes debris.
Appliance cavity service. Lint below the filter and other reachable areas are cleared.
Termination service. The hood and damper are cleaned; no screens are left in place.
Airflow verification. We confirm strong discharge at the hood with the dryer operating.
Recommendations & photos. If we find crushed flex, screened caps, or excessive elbows, we document fixes.
Between-visit care that keeps results longer
Clean the lint screen every load. If softener residue makes water bead on it, wash with mild soap.
Leave space behind the dryer so the transition isn’t crushed when pushed back.
Step outside monthly to make sure the damper opens freely and closes when off.
Use the shortest possible UL 2158A transition; avoid screws penetrating the airstream.
A smooth, rigid, well-connected duct restores airflow and shortens cycles.
Bottom line: A clear path out of the house turns long, hot laundry days back into simple, on-time cycles—and protects your dryer.
FAQs
Is a roof termination bad?
Not inherently. Roof vents can perform well if the route is within limits and the damper moves freely. They simply require more frequent checks and often a shorter interval.
Will cleaning void my warranty?
No—vent cleaning is normal maintenance recommended by manufacturers. It keeps temperatures and run times within design limits.
Airflow is measured in cubic feet per minute. The blower inside your dryer is designed around a specific resistance (static pressure). Add a long vertical rise, multiple tight elbows, or an outlet that does not swing fully open and resistance climbs. The same blower now moves less air per minute, and the lint that would normally ride the airstream outdoors drops out earlier inside the duct. That is why two homes with the same model of dryer can need very different cleaning cadences. The physics are simple: fewer turns and a shorter path reduce deposits and extend time between cleanings.
Scenarios & recommended intervals
Single resident, first-floor laundry, wall vent: Annual cleaning is usually sufficient when loads are light.
Young family with pets, laundry closet on interior wall: Every 6 months is realistic thanks to shedding and bulky items.
Townhome with roof termination and 3+ elbows: Every 6 months, plus a quick hood check each month.
Short-term rental with frequent linens: Quarterly cleanings keep turnover days on schedule.
Energy & time savings when you clean on time
We track outcomes after service. In homes with overdue vents, mixed loads typically drop by 10–30 minutes. That’s dozens of hours rescued per year in busy households. Elements cycle less, motors work easier, and fabrics take less heat. Those small wins add up to a dryer that lasts longer and a laundry routine that feels normal again.
Baseline timing test
Right after a professional cleaning, dry a standard mixed load and record the time. That becomes your baseline. Tape the number inside the laundry door. If you later notice a 15–20 minute increase, do quick checks (lint screen, transition not crushed, damper moving). If the change persists, move your cleaning up—don’t wait for a total blockage.
What to expect on appointment day
Arrival & walk-through (5–10 min): We verify the route, discuss access, and explain the plan.
Prep & protection (10 min): Floors are protected and the dryer is positioned for safe access.
Cleaning (30–60 min): Rotary brushing with capture clears the run from both directions; the appliance cavity and hood are serviced.
Verification (5 min): We confirm strong discharge at the hood and demonstrate damper movement.
Review (5 min): Photos, recommendations, and the ideal schedule for your home.
Common myths, answered
“I clean the lint screen, so I’m covered.” The screen catches a lot but not everything; fine fibers pass through.
“A stronger heat setting will fix slow drying.” Heat without airflow just cooks fabric and stresses parts.
“A screen on the outlet keeps pests out safely.” Screens trap lint and are not permitted for dryer exhaust.